![]()
I’ve been on the market for a cool, attractive clock lately. But I can’t believe how much some clocks actually cost! I mean, c’mon, it’s a clock! I just can’t justify shelling out hundreds of dollars for something I don’t actually use to tell time. When was the last time you checked a clock and not your phone or watch for the time?
I always see bloggers making their own less expensive versions of cool items from stores, so I figured I could too. The thought came to mind when I was perusing West Elm’s website and fell completely in love with this clock:
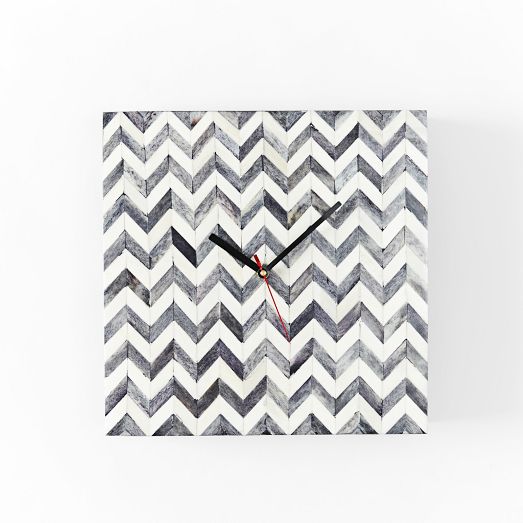
It’s super adorable right? But I just couldn’t justify to myself spending $100 on a clock. Especially one that is so hard to read. (I like numbers, ok).
Well, I thought, I can make that! So I did. And it only cost me $15 for all the supplies. Here is how I did it:
You will need:
- A square wood board (I used this basswood canvas)
- A clock kit (I used this one)
- A drill to make a small hole
- Masking or painter’s tape
- A measuring tape
- A pencil
- White and grey paint
- Paintbrush
- Exacto knife
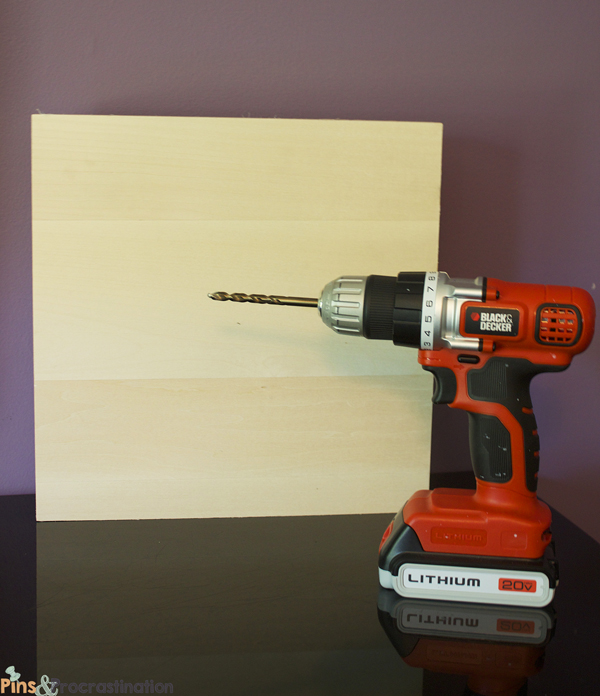
Step one: Drill the hole
The first thing you will need to do is drill the small hole into the board. I was able to do this myself and it was easy enough. Make sure you make the hole large enough for your clock kit but don’t make the hole too large- but don’t worry about whether it looks neat or not, the clock will cover it.
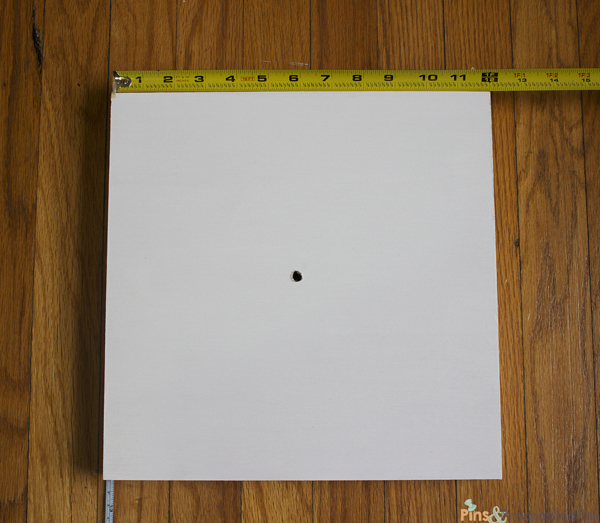
Step two: Paint the board
Then, paint the board white and let it dry overnight. You don’t want to risk the tape peeling off the paint by being too eager, so best to let it dry for longer.
Step Three: Make your Chevron Pattern
Next, you will want to make the chevrons out of masking tape. I found this amazing method to tape off a chevron pattern, which is what I ended up doing. Basically, you make a grid, tape off a gingham pattern, and cut the chevrons out of it. It sounds more complicated than it is. But in case that is too much work for you, I found this great chevron stencil for $7. It makes the final cost of the project a little higher, but for those of you who are a little more DIY-challenged it makes it easier.
But if you want to try the masking tape method, it is quite easy.
First I marked off 1 inch intervals on each side of the canvas:
![]()
And I taped diagonally on every other inch
![]()
Then did the same going the other way.
![]()
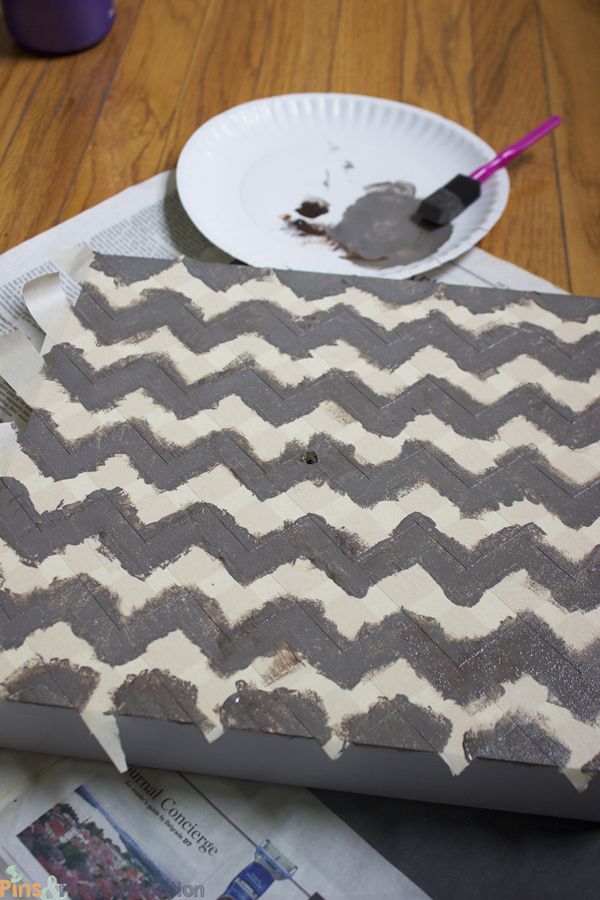
Then, using my exacto knife, I trimmed off the pieces that were where I wanted the painted chevrons to be. This method was so easy and simple. I’m so glad I found it.
![]() See how great the chevron pattern looks?
See how great the chevron pattern looks?
![]()
Step Four: Paint
Then, I just painted the chevron stripes. I used a sponge rather than a paintbrush because I wanted a more messy textured feel to be more similar to the west elm clock.
And once you let the paint dry, all you have to do is peel off your tape and your chevron pattern is done!
![]()
Step Five: Install clock kit
Finally, you will want to install the clock kit once the paint is dry. Each kit you get should come with its own instructions, but it is pretty self explanatory and easy to follow. You pretty much just put in a battery, attach it to the clock, and attach the hands.
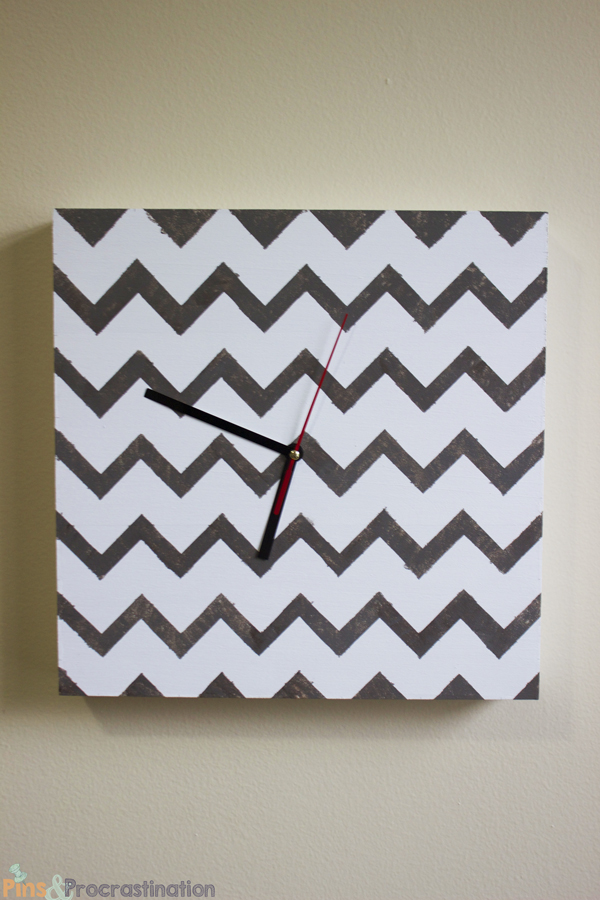
And there you go! You’ve made yourself your own chevron wall clock! And for only $15!
Using the canvas instead of a flat board was an advantage because it was easy to hang, and there was room in the back for the clock kit. If you use a flat board, you might have to get more creative for hanging.
![]()
So adorable! I saved so much money making this clock myself, and I think I like it even more than the original. DIY success!
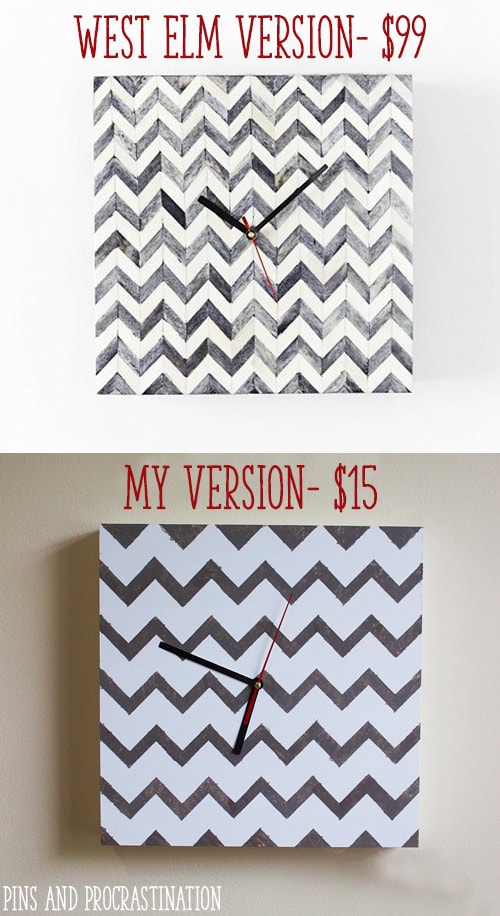
I finally found a permanent home for this clock in my living room. I think it looks amazing in there. Creating a functional, adorable, clock is so much easier than it looks. DIY for the win!


PJ says
Great knock off! I am impressed. Can you make one with numbers now? It would probably ruin the chevron pattern right?
Susie says
Thank you! It would definitely be easy to add numbers but I love the minimalist look it has without it. But you could easily use number stickers or paint with a stencil.
Melissa @ A Prudent Life says
Cute knockoff -and using the canvas to leave room for the clock workings was brilliant!
Bonnie Andrews says
Lovely work! :-)
Susie says
Thank you! It’s easier than it looks!
Melissa says
It looks great. Now I know how to paint a chevron pattern! Thanks for sharing.
Erica says
Nice! I always love a good west elm knock off :) This turned out great! I always need clock numbers too – estimating is too hard!
Ashley@Biggerthanthethreeofus says
I love a great knockoff. Love the tutorial and the clock! Thanks for linking up to the DIY’ers!
Jen says
Very cute! This looks like a great summer activity for me to try.
Erlene says
What a great way to make chevron stripes. The clock turned out really nice.Thanks for sharing your tutorial on Merry Monday Linky Party.
Lydia says
Love this clock! I really like the modern look that it has. Thanks so much for linking up to Much Ado About Monday. We are featuring your clock this week so be sure to grab a featured button!
Susie says
Thank you so much! I am honored!
Iryna says
Hi, looks like you and I had the same idea for a hack :P. Totally beats paying $100 for a square foot of clock. :) Glad I found your tutorial to help me prep though. I referenced to you in my post http://www.redbarberry.com/diy-west-elm-herringbone-clock/ hope it’s ok!
Susie says
Your clock looks great! I love the stencil that would have saved so much time. Thanks for linking to me!