Vinyl transfer paper is one of the best inventions ever. There, I said it. For all you crafters, you’ll wonder how you ever got by without it. If you’re making any kind of vinyl designs- vinyl transfer paper (or vinyl transfer tape, as I usually call it) is your new best friend. It may seem confusing to use at first- but that’s why I wrote this tutorial to easily walk you through it- and soon you’ll be transferring like a pro.
I’m going to walk you step-by-step through this easy tutorial. There’s pictures for every step- so you really can’t go wrong. Soon enough vinyl transfer paper will feel like a breeze for you.
It’s actually very easy to use- but it’s worth going through all the steps for Cricut newbies like me. I added text instructions in case you need it, but you will probably be able to figure out how to use the transfer tape just from the pictures.
This tutorial will also apply to any other cutting machine you may use- everything but the first few steps in the design studio. So don’t be discouraged from using this post if you don’t use a cricut. And if vinyl isn’t for you, I’ve also written a great tutorial on how to make custom wood signs with paint!
So let’s get to it!
supplies:
- A cutting machine (I use the Cricut explore air, which you can buy from Cricut or on amazon)
- Vinyl (I used this one, and expressions vinyl sells tons of great inexpensive vinyl)
- Vinyl transfer paper (aka vinyl transfer tape)
- The object you are putting your vinyl design on (I used a cute wood sign like this one)
- Scraper or a stiff card like a credit or gift card
- Weeder (optional)
step one: design
The first step will be to use your cutting machine’s design software to make your vinyl design. I’m going to talk about the Cricut design studio because I use a Cricut.
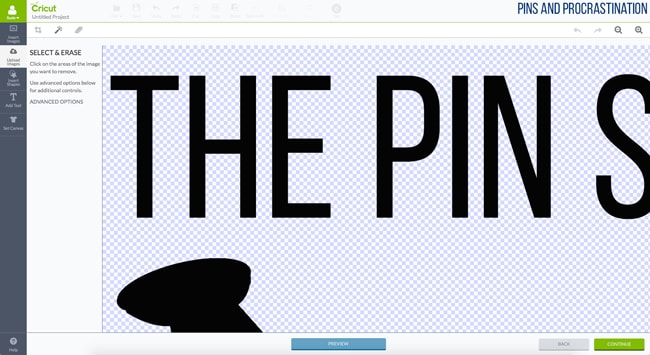
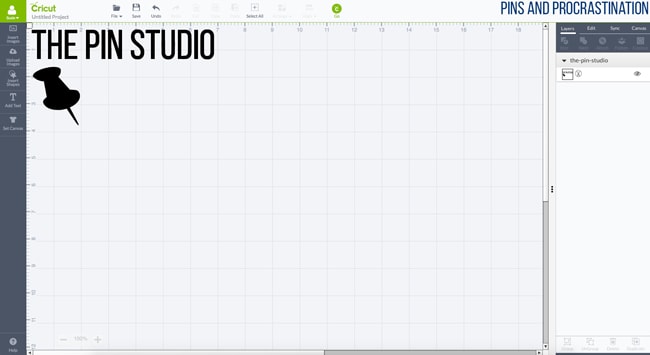
You can use the editing tools in the design studio to make your design. You can write words with any of the cricut fonts or any fonts on your computer, or you can upload an image. If you upload a .png file, it should leave the background blank. But if you upload a .jpg or other file format, you may need to “select and erase.” All that means is that you select the white space around and between letters to leave only the letters you want to cut.
Make sure your layer is set to cut, and you should be ready to go!
step two: load and cut
The next step is to cut your design out of the vinyl.
You’ll want to apply your vinyl to a cutting mat and load it into your machine. In the Cricut design studio, you press “go” and then make sure the Cricut has the correct settings before cutting.
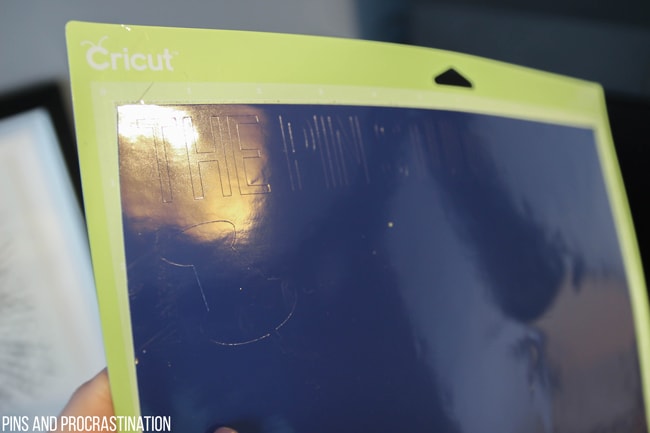
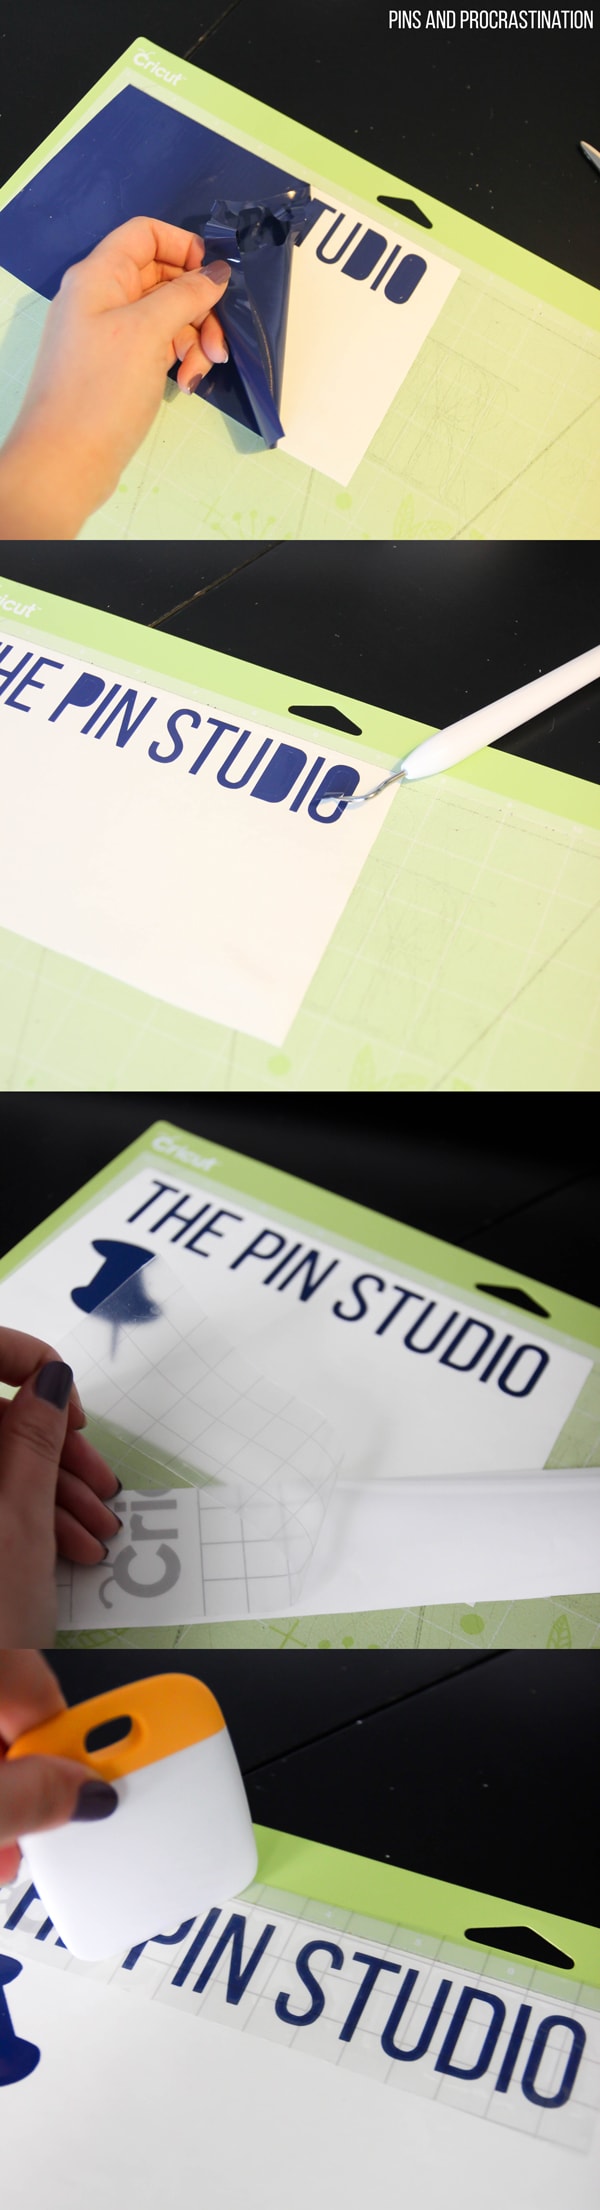
When your vinyl is cut, you will be able to see the outline of your final design, like in the photo below.
Step three: weeding
Weeding is when you remove any excess vinyl so that only your final design remains. You should be able to do this easily by just peeling up the excess vinyl. If the design starts to come up with it, just push it back down with your finger. You can use the awesome weeding tool to help get any small pieces like the circle inside the “p.” You can see all this in the images below.
When you are done you should have just your final design remaining on the mat.
step four: apply vinyl transfer paper (vinyl transfer tape)
To apply your vinyl transfer paper, first peel the backing off the transfer paper. Press the vinyl on top of your final design. You can use the scraper tool or an old credit card to make sure the design is attached tightly to the transfer paper.
You can see this in the photos below.
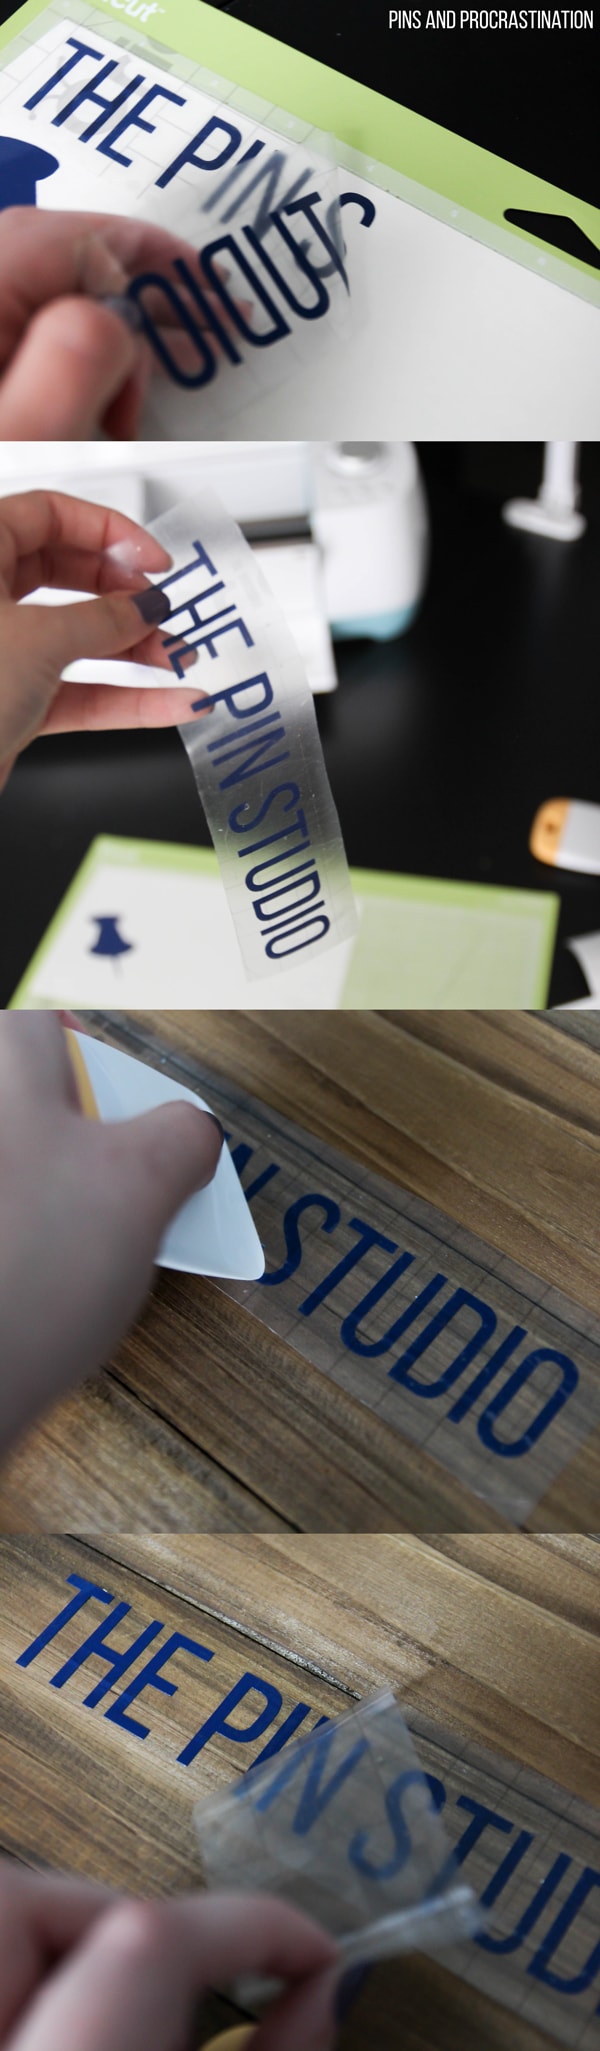
step five: peel vinyl transfer paper (tape) with vinyl attached
This step can be a little tricky, but if you are slow and careful it should be easy. You’ll want to peel up the vinyl transfer paper with the entire design you want to transfer attached. Some of it may not peel up, in which case you can put the transfer paper back down and go over that section again with the scraper or your finger until it comes up when you are peeling.
In the pictures below, you can see that the S was being stubborn and not peeling up, so I put the tape back down to reattach it until I got the full design on the transfer paper.
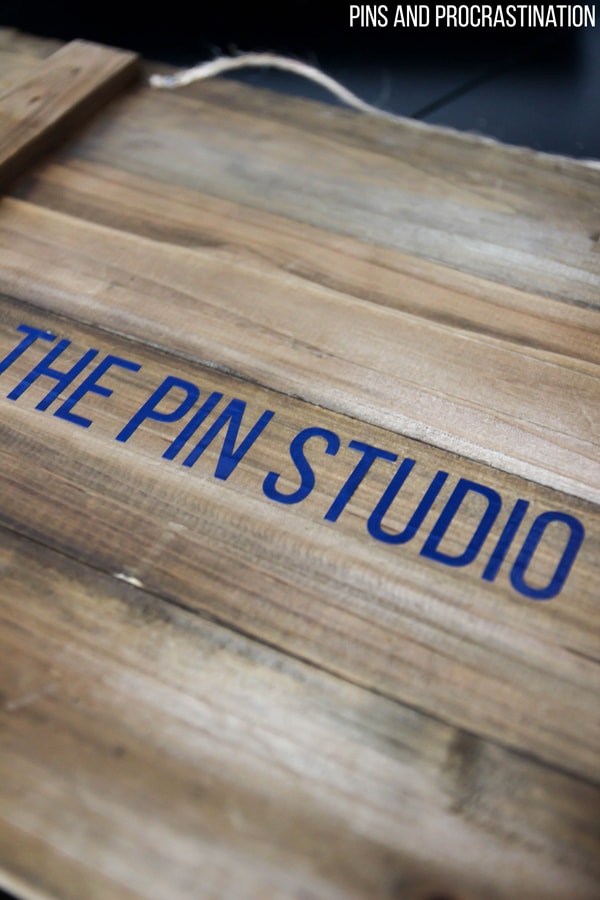
step six: place vinyl transfer paper (tape) and apply
Once you’ve got your vinyl design on the transfer paper, you’ll want to place it where you want it to go on your final design. You can put vinyl on all kinds of things- decorative signs, water bottles, mirrors, walls… whatever you can think of!
I’m using a sign for this tutorial, so I placed my design in place. I then used my scraper tool (or you can use a credit card) to firmly apply the design to the sign.
step seven: peel off vinyl transfer paper and admire!
Once your design is firmly applied, you can just peel off the transfer paper and admire your final design!
If the vinyl transfer paper does not peel cleanly leaving the entire design behind, you can place the paper back down and scrape again. In my experience, this step is usually the easiest.
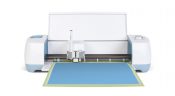
Woohoo- you made it! I told you it’s easier than it looks!
So there you go- I told you it’s easier than it sounds. Once you get the hang of the vinyl transfer paper you will be able to customize and design anything you set your mind to.
I love the new sign I made for this tutorial!

So, what do you think? Are you a vinyl transfer paper expert now? Get going on those craft projects!
supplies used in this post
 |
 |
 |
 |
 |

Amy Cutlip says
This is a weird question, but what font is that?
Susie says
Not weird at all! It’s Bebas Neue.
Gina says
Have you had issues with paint, varnish, etc. peeling up with the transfer tape? I did on my first attempt and wondered what I might have done wrong.
Susie says
No- I haven’t! Wish I could help more.
Katie says
I can’t wait to have a play with some vinyl in my new machine. Can you reuse the transfer paper?
Susie says
I don’t think so, but it could be worth a try!
Susie says
Hi Katie,
I just did a project where I tested out reusing the transfer paper. I was able to successfully reuse it 3 times on one project, but the third time the vinyl really didn’t want to come up. It’s worth trying!
Mariska says
I was watching a craft show on TV and she reused her transfer tape. She slapped it up on the wall until she moved on to her next item. I haven’t tried it myself, but it looked like she used it 3-4 times.
Dianna Bryant says
I reuse my transfer tape all the time.
Sue says
What did you seal it with?
Susie says
I often use a matte mod podge, but for projects like this where nothing is going to rub against or bump the sign, I often leave them unsealed.
Lauren says
Hi, new to this and loved your step by steps on the vinyl transfer tape :) I want to send a monogramed decal to my mother in law for her new yeti mug. Do you recommend Just laying the tape over the vinyl and send it that way with instructions?
Thanks!
Susie says
I think that sounds like a great idea! What a smart gift.
Kayla says
You make this look so easy, but I am having a hard time getting the vinyl to come off of the transfer tape. I am scraping and scraping and it never seems to want to stick to my project. I have used glass and wood so far, and it’s becoming very frustrating. Do you know what I can do to make this easier?
Susie says
With really stubborn vinyl I use the cricut weeder tool to make it pull away from the tape. I’m sorry it hasn’t worked as well for you!
Alicia Witherspoon says
Is the vinyl to use on wood and stainless steel the same vinyl you use to do T-shirts/fabric?
Susie says
No- that’s a different process. You need specific iron on/ heat transfer vinyl, and you also cut the design backwards when using iron on vinyl. Here’s a good tutorial.
Pete Lovegrove says
Hello! I would like to create a decal for the rear window of my car, to advertise my business. Will the vinyl that you use be appropriate? Also I would like to incorporate an image of my finished project. Is this possible?
Susie says
You can use images in the cricut design software. You could use the same vinyl here but it might not hold up well long term. If you want something that will last a long time, you can look for “outdoor vinyl,” like this one: http://amzn.to/2pOGMiI
Brandy says
Thanks for sharing. It’s hard to find instructions on cricut everyone seems to use the silhouette. I can not wait to do a project.
Brenda Theobald says
Thanks so much…this tutorial was very clear. It was my first attempt with the vinyl & transfer tape, and you gave a great walk-through!
Patricia Kull says
I cut my design several days before I actually got around to transferring and now I can’t get vinyl to separate from transfer paper. What am I doing wrong
.
Susie says
You might just need to be patient and continue to rub it. Sometimes it takes longer than you’d think.
Jo Forrest says
Hi, what is the smallest size type you can cut with the Cricut? I’m looking for a better method to apply text to a painting. Thanks, Jo.
Susie says
I’m not sure! If you get quite small, the details end up being difficult to transfer. I usually stick with a thicker font because of that. The smallest text I’ve done was probably letters that were about 1/3″ tall, and I could have gone a bit smaller without issue. But I’m not sure what the minimum is. Might be worth testing out!
Mara says
I was thinking of making name decals for my husband’s class for the fire academy. They all have the same bins to put all their stuff in and need name tags but everyone’s has to look the same. Anyway, do you think that this process is easy enough for a bunch of guys to transfer it when I’m not there? :) How well does the vinyl transfer to plastic? Thanks.
Susie says
I think so! If you give it to them already attached to the transfer tape and tell them to use a credit card to rub it on the bins, it should work!
Ashley says
When you purchase regular vinyl… cricut brand for instance …. that is not heat transfer …. does it automatically have adhesive on the back? I just Want to make sure I have the correct vinyl to try this. Thanks!
Susie says
Regular vinyl should be adhesive, but there are different types for different uses. Some are acceptable for only indoor projects, some can be used outdoors, etc.
Karen says
When I weed, the white backing on the vinyl co es off with the vinyl. Then I have to go back and remove the white backing before I can use the transfer tape, what am I doing wrong?
Susie says
Have you tried using the cricut weeder tool? It helps me a lot.
Teri Egbers says
What’s the best way to do this if you’ve used several different colors for your project?
Susie says
When using different colors, I usually apply them one at a time using transfer tape each time. I’m sure you could place them all on the same piece of transfer tape, but I wouldn’t trust myself to line it up perfectly that way.
Susan says
Do you Mirror your image before cutting the vinyl
Susie says
If you are using standard vinyl, there is no need to do this. If you use iron-on or heat transfer vinyl you will need to mirror the image.